Use the Custom Entity API
Requirements:
- Follow the Create a Custom Entity guide first
Goals:
- Create an API Key
- GET: List all the tasks
- POST: Create a task
- GET: Get a specific task
- PUT: Update a task
- DELETE: Delete a task
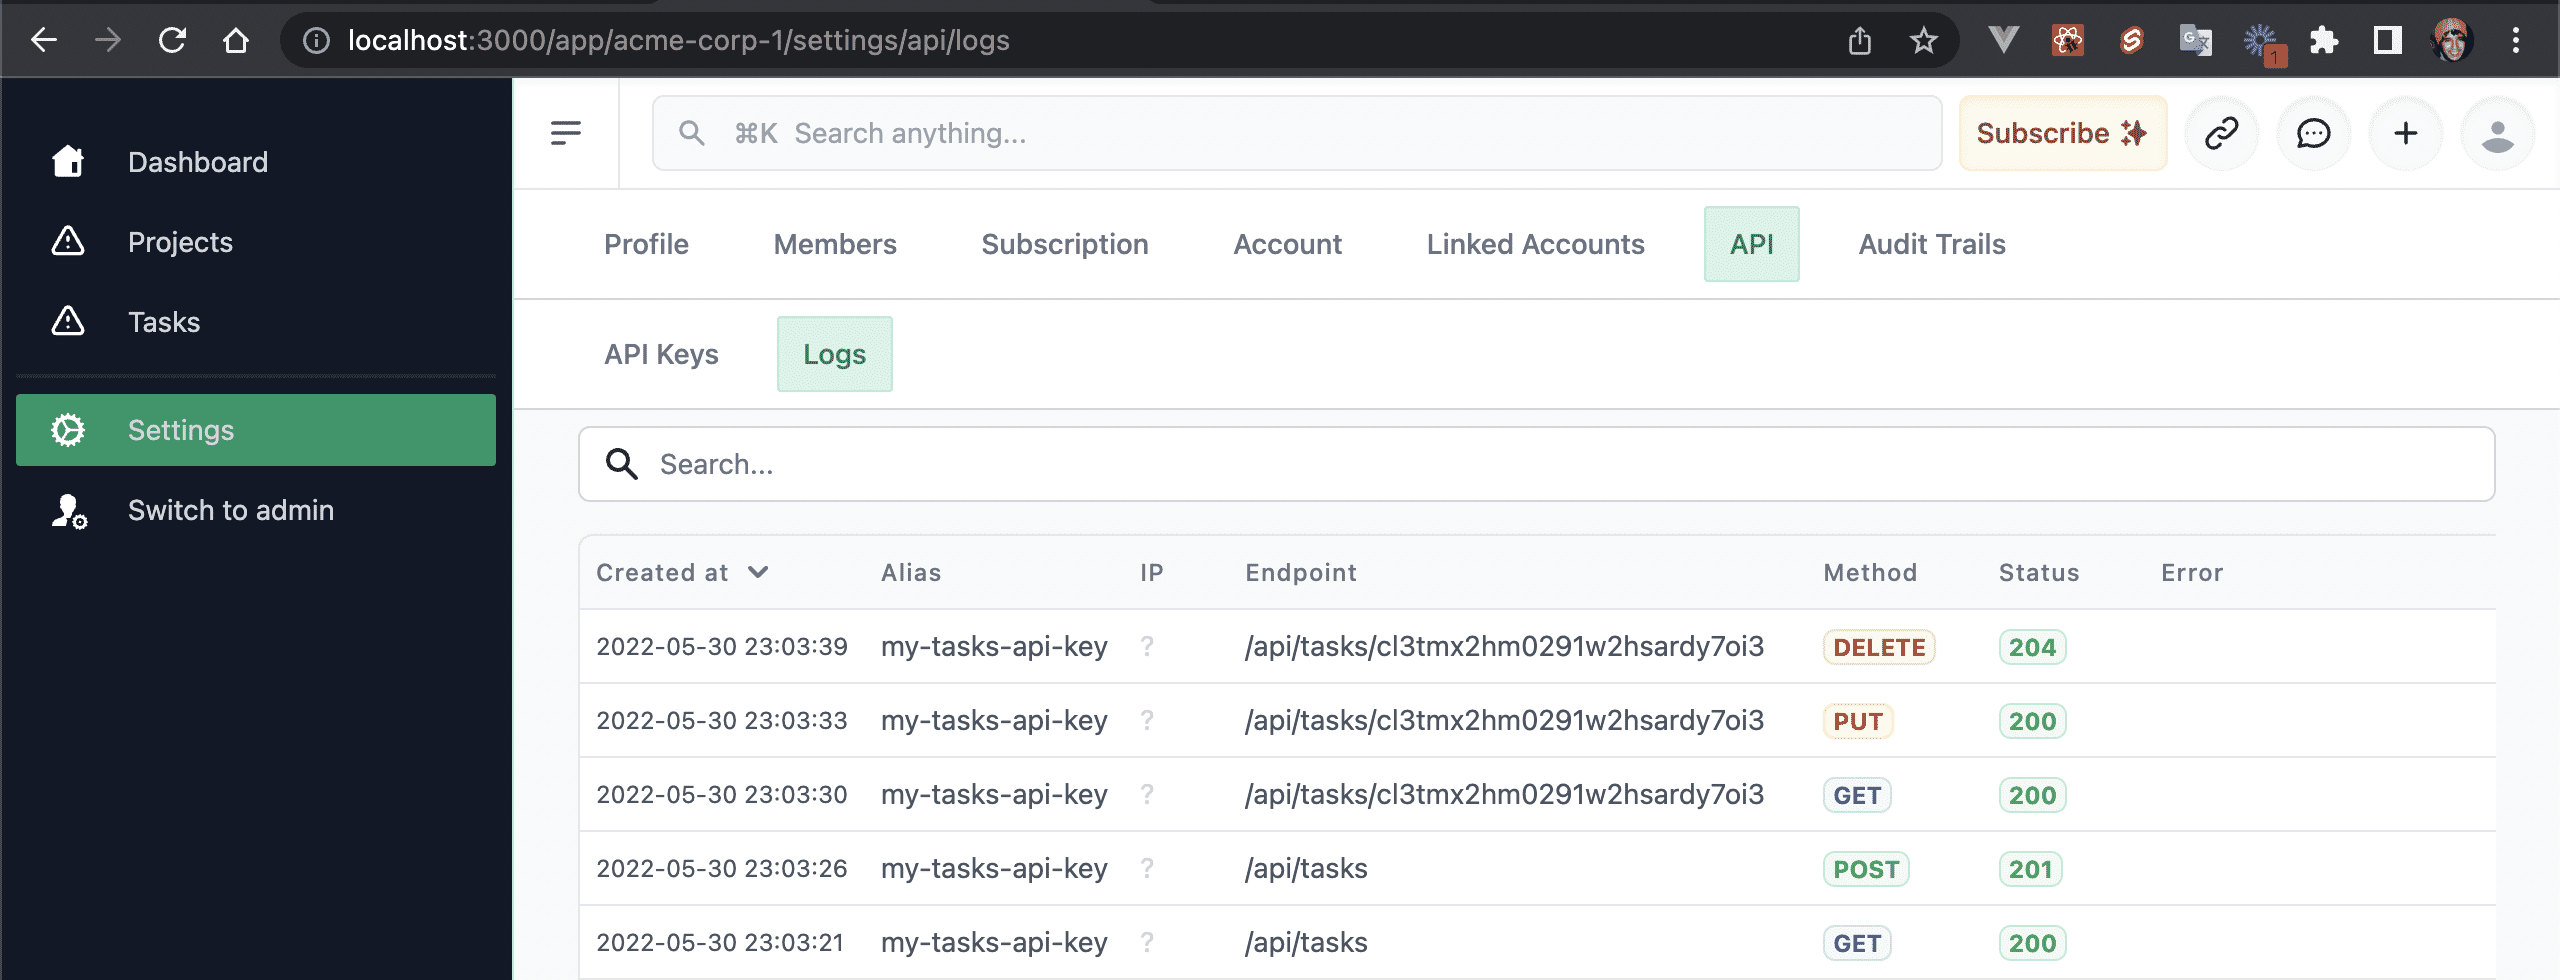
- View the API Key Logs
Steps
💿 Go to the /app/acme-corp-1/settings/api/keys/new to create an API Key with /tasks permissions.

💿 Install Thunder Client for VS Code.
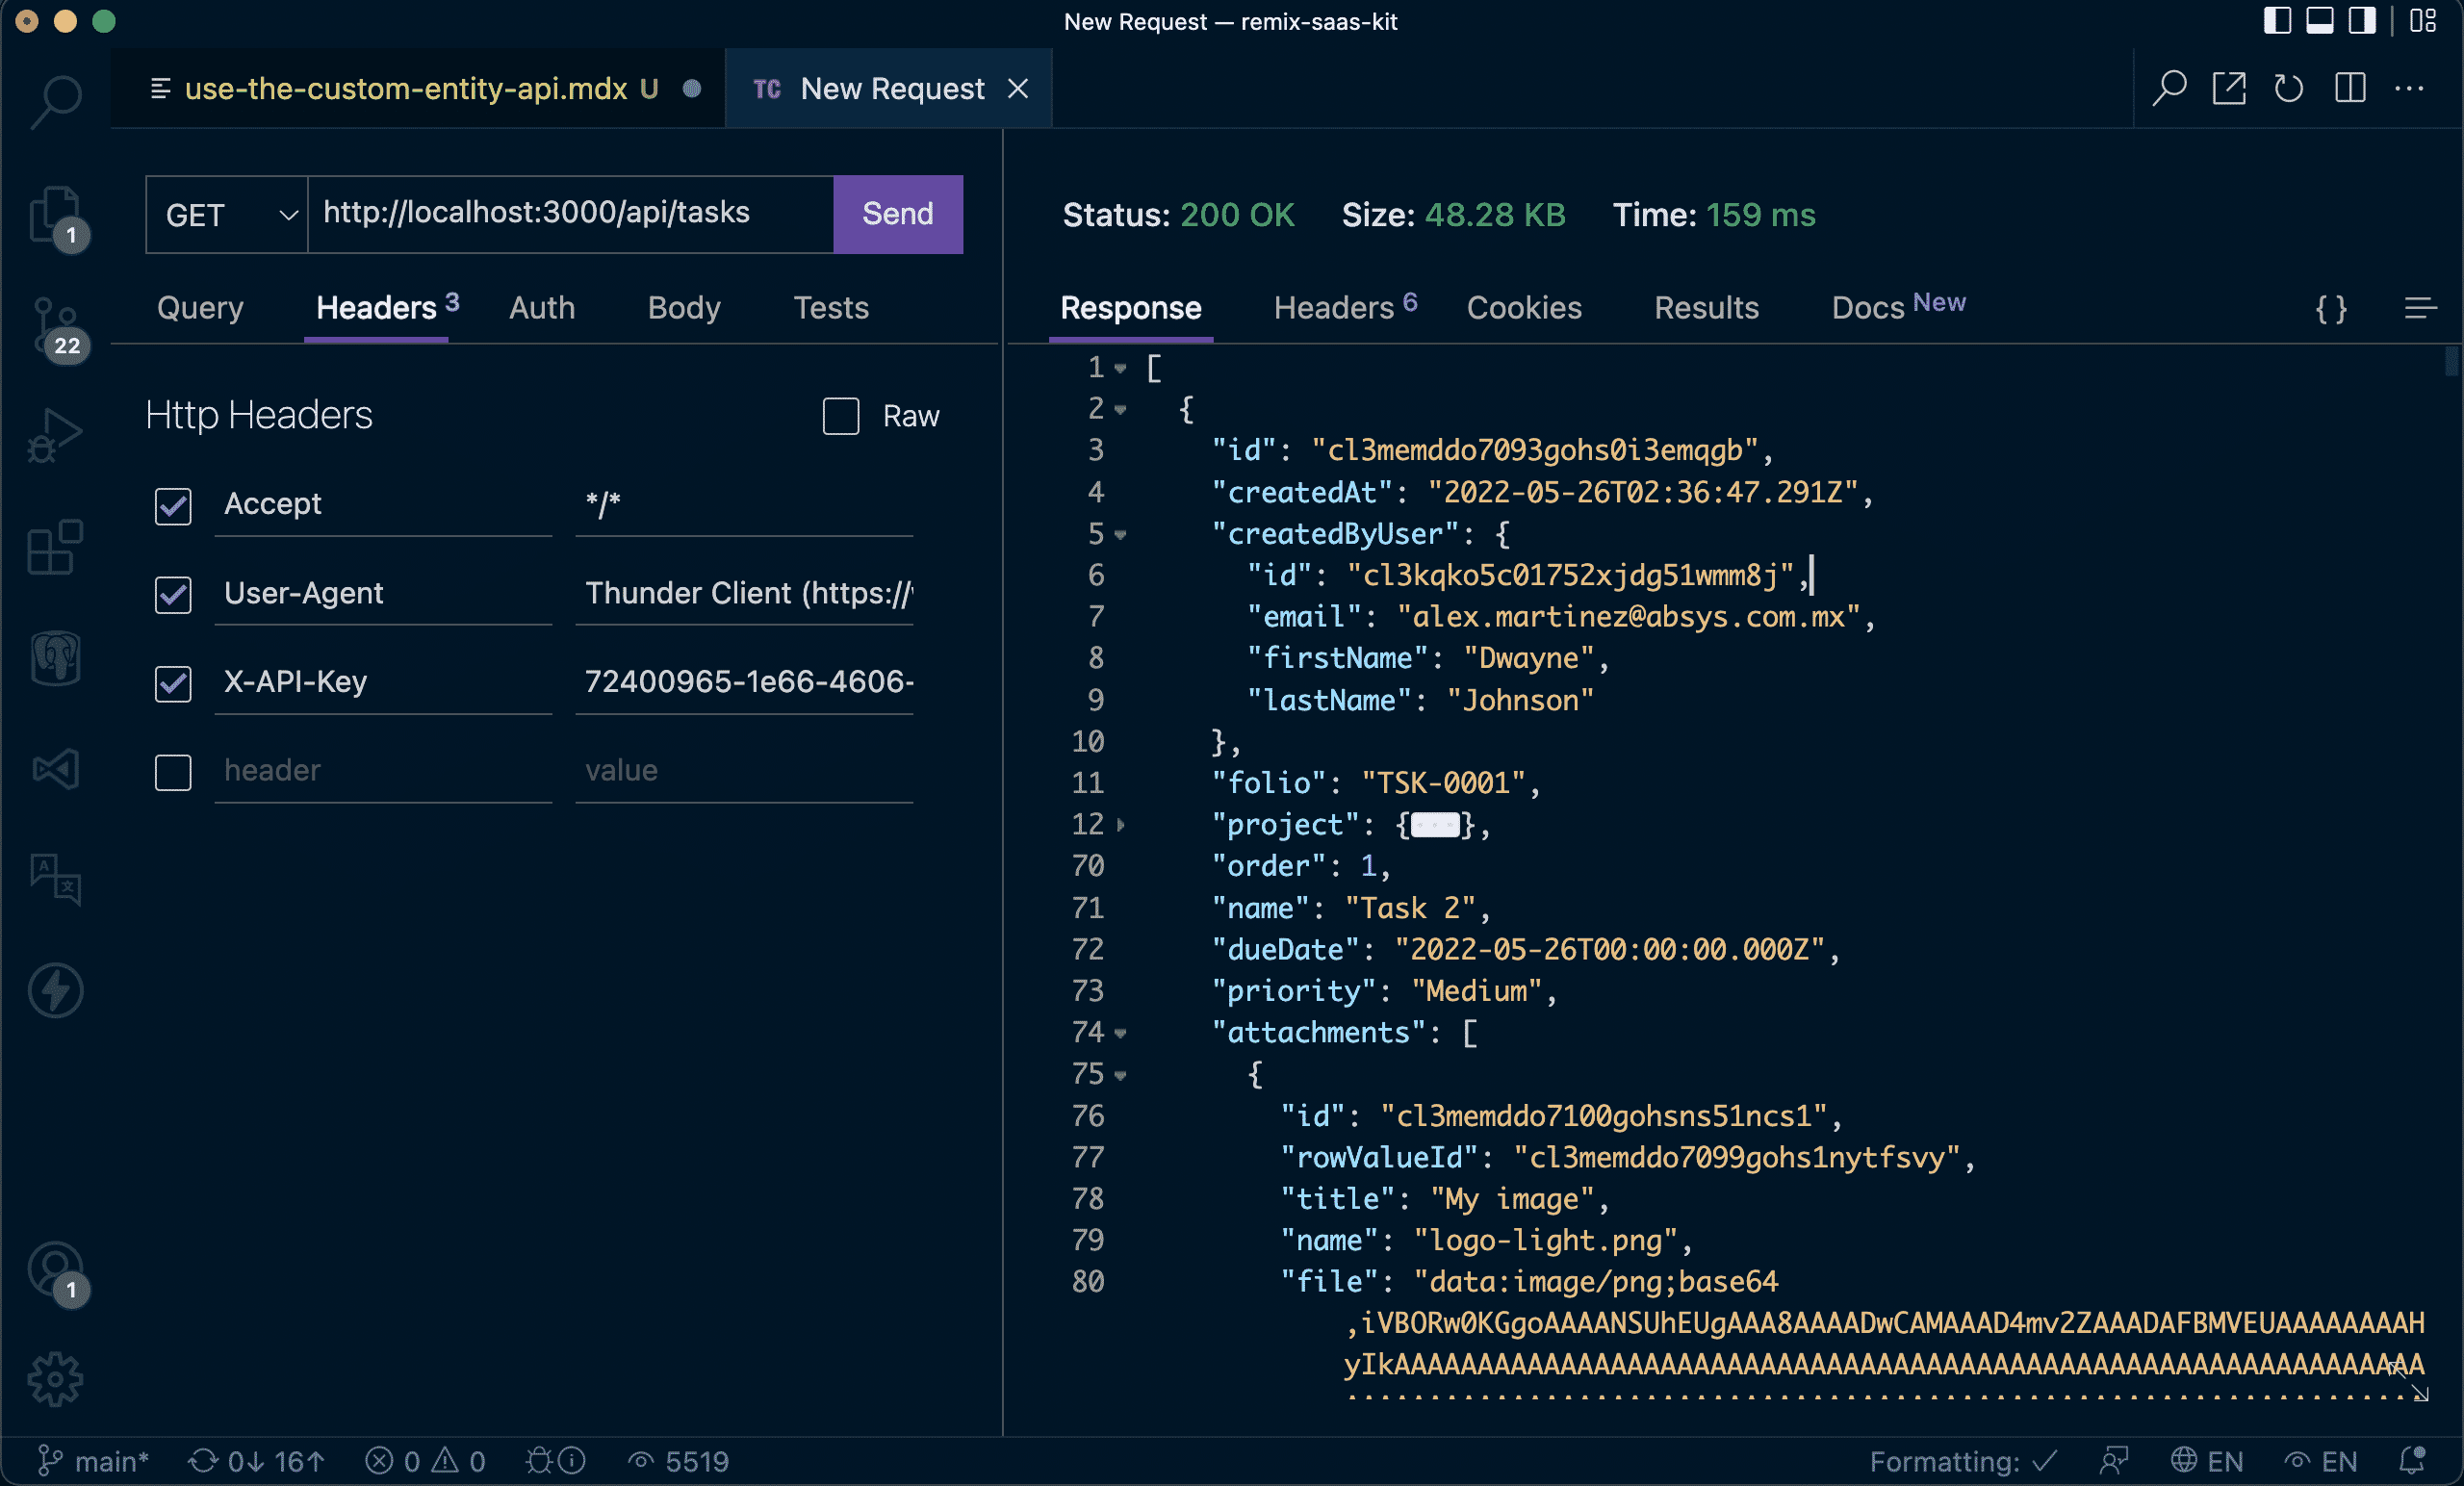
💿 Create a GET request with the following values:
- Method: GET
- URL: http://localhost:3000/api/tasks
- Headers: add the "X-API-Key" header with your API Key (click on Copy to clipboard)
💿 Click Send.
You should get all the tasks in JSON format:
💿 Before making a POST request to create a task, go to /app/acme-corp-1/projects, click on Edit on any project row and copy the ID from the URL.
It should look something like this: cl3me5utq3138gohsoss1mqyv.
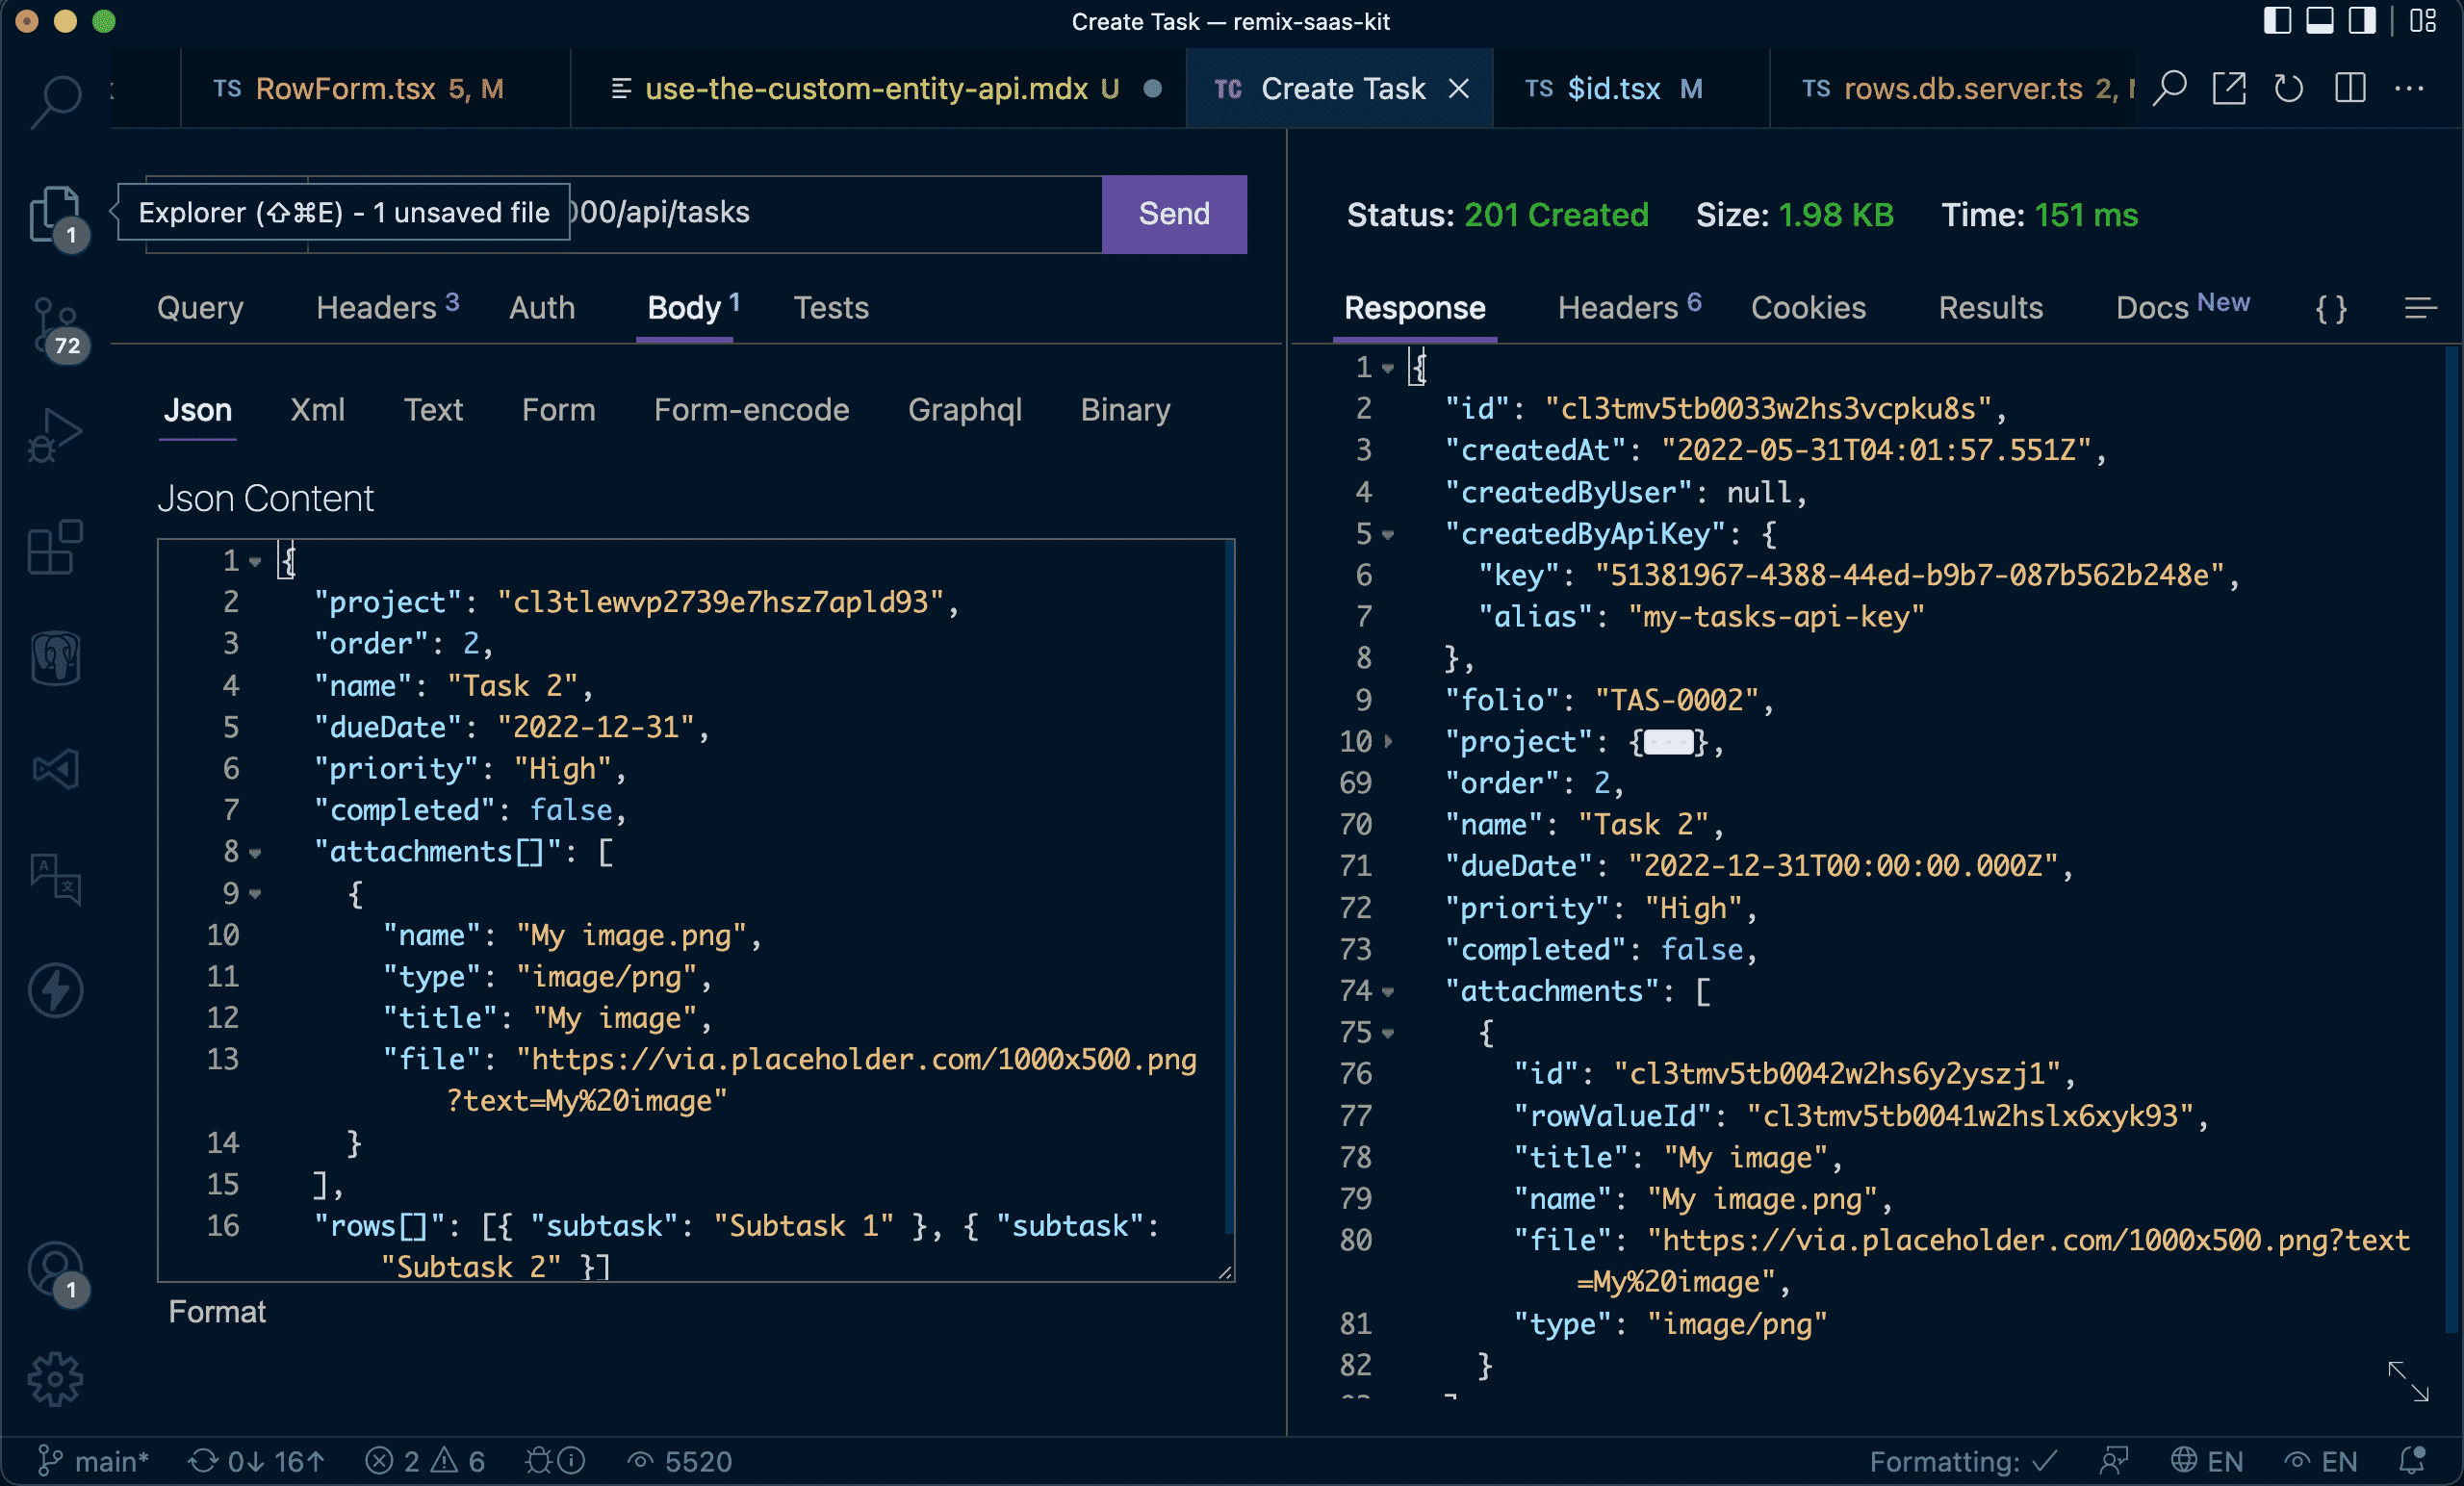
💿 Create a POST request with the following values:
- Method: POST
- URL: http://localhost:3000/api/tasks
- Headers: set the "X-API-Key" header
Set the following JSON values:
{
  "project": "cl3tlewvp2739e7hsz7apld93",
  "order": 2,
  "name": "Task 2",
  "dueDate": "2022-12-31",
  "priority": "High",
  "completed": false,
  "attachments[]": [
    {
      "name": "My image.png",
      "type": "image/png",
      "title": "My image",
      "file": "https://via.placeholder.com/1000x500.png?text=My%20image"
    }
  ],
}
You should get a 201 - Created response.
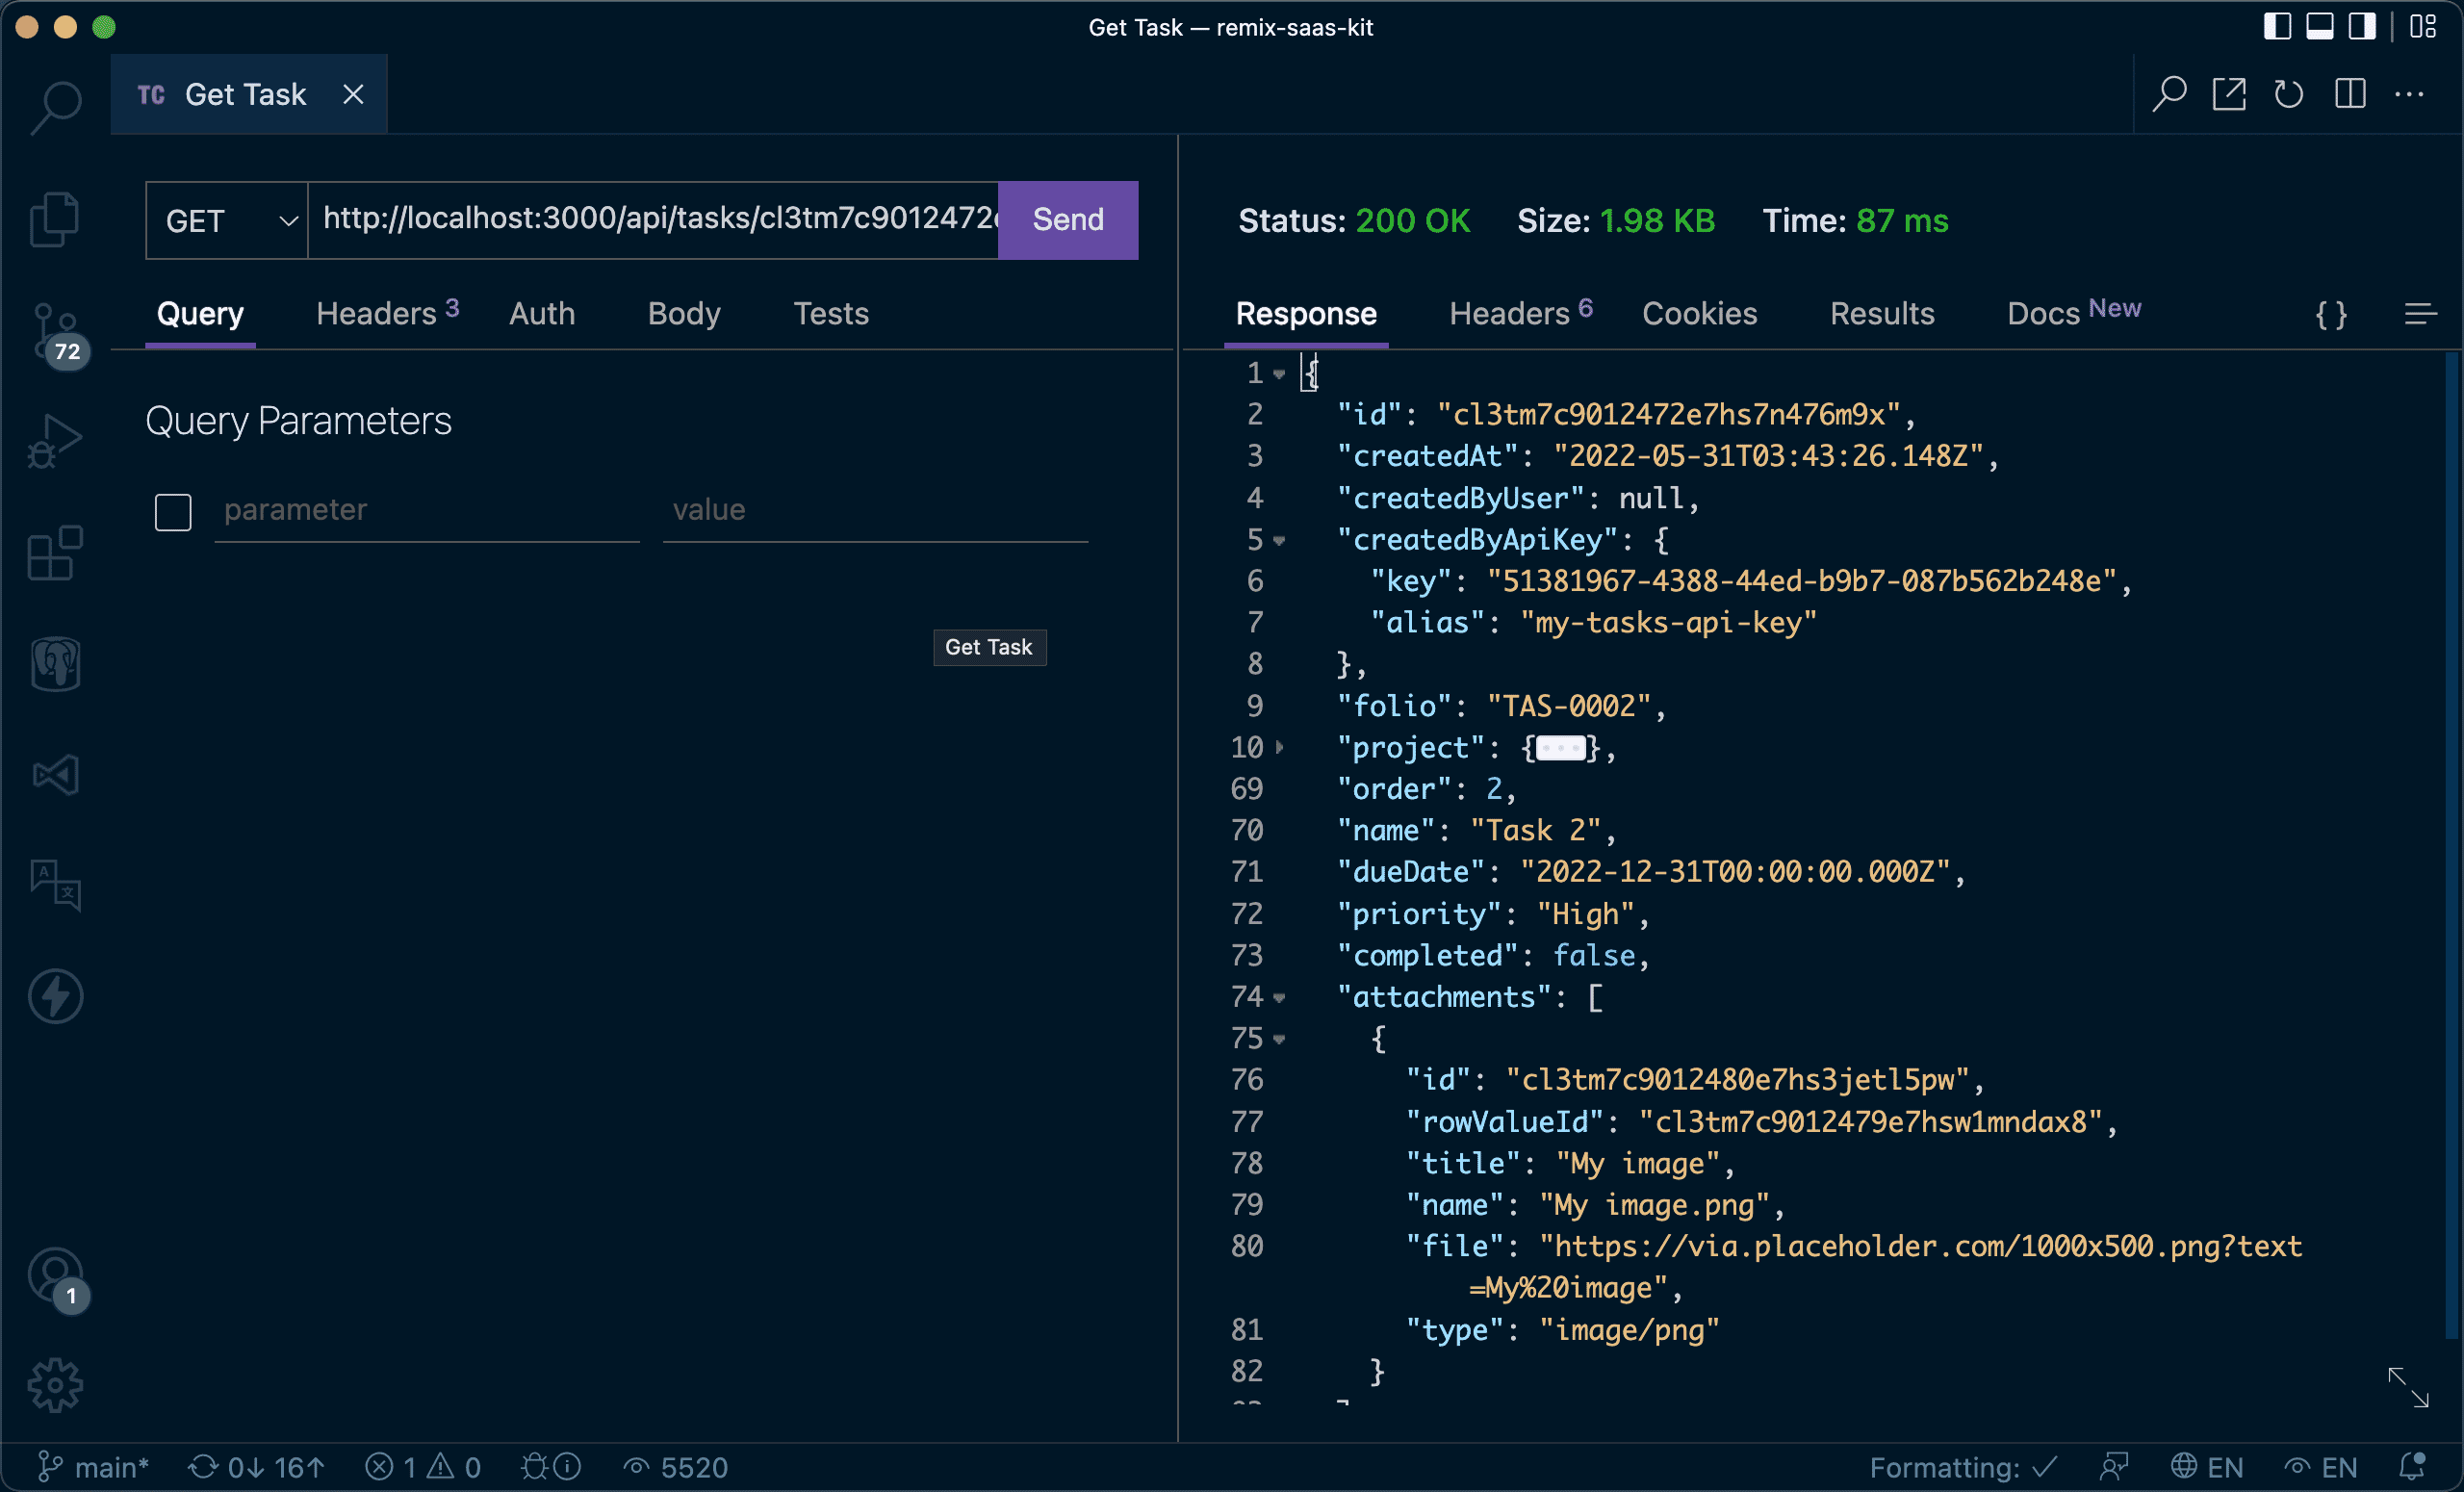
💿 Grab de ID, and make a GET request:
- Method: GET
- URL: http://localhost:3000/api/tasks/cl3tlv1yc8446e7hsn07ac3gd
- Headers: set the "X-API-Key" header
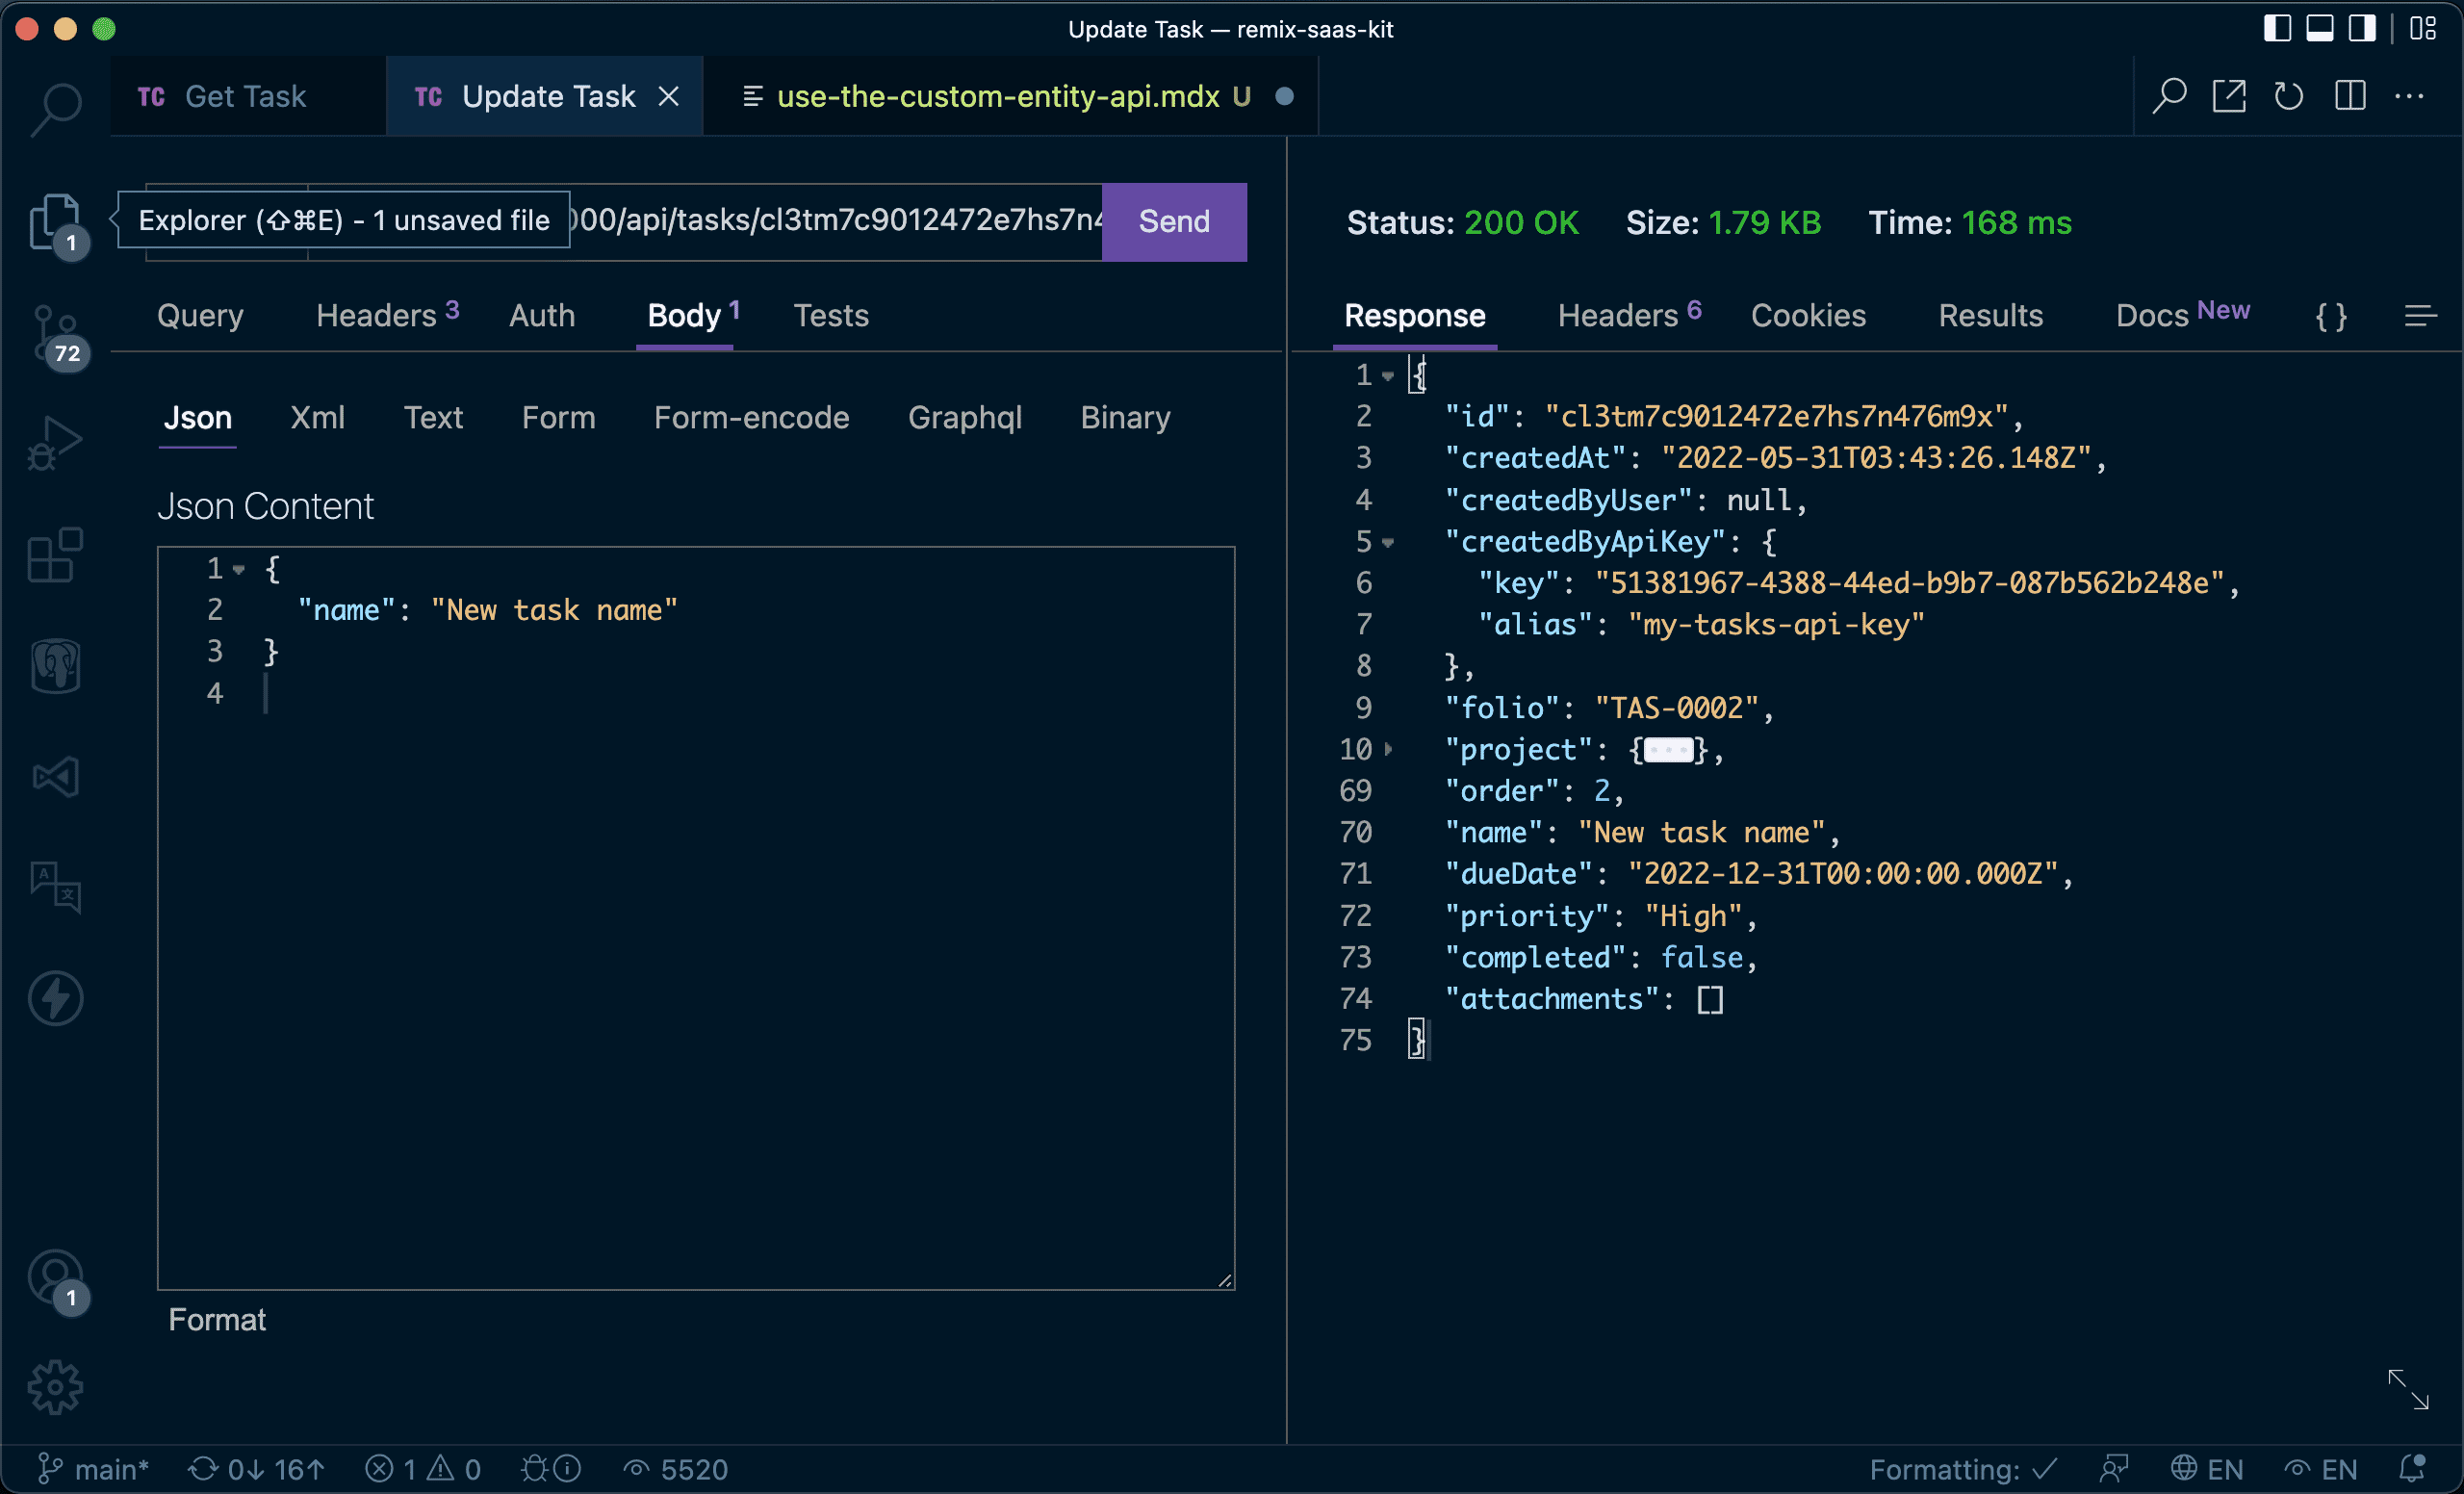
💿 Now, let's update the Task with a PUT request.
- Method: PUT
- URL: http://localhost:3000/api/tasks/cl3tlv1yc8446e7hsn07ac3gd
- Headers: set the "X-API-Key" header
JSON body:
{
  "name": "New task name"
}
💿 Delete the Task:
- Method: PUT
- URL: http://localhost:3000/api/tasks/cl3tm7c9012472e7hs7n476m9x
- Headers: set the "X-API-Key" header

💿 Finally, view the API Key logs.
I hope this quick guide was useful! Let me know if you have any question.